Part 7: putting it in the case
- May 15, 2025
- 1 min read
This was the easiest part of my project by far. The case was something I had been given by a friend and I have been wanting to use it in a project for awhile.

I designed the PCB to fit inside, and then I just made a very basic board hat for the buttons, which I installed with 3mm screws and standoffs:
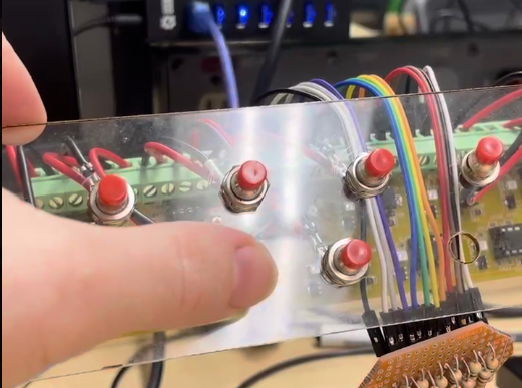
I screwed the summing circuit onto the back of the board hat:

And then I glued the speakers and amplifier circuit into the lid!

I have it plugged into an 18650 battery here, but you can plug it into a wall outlet as well.


Comments